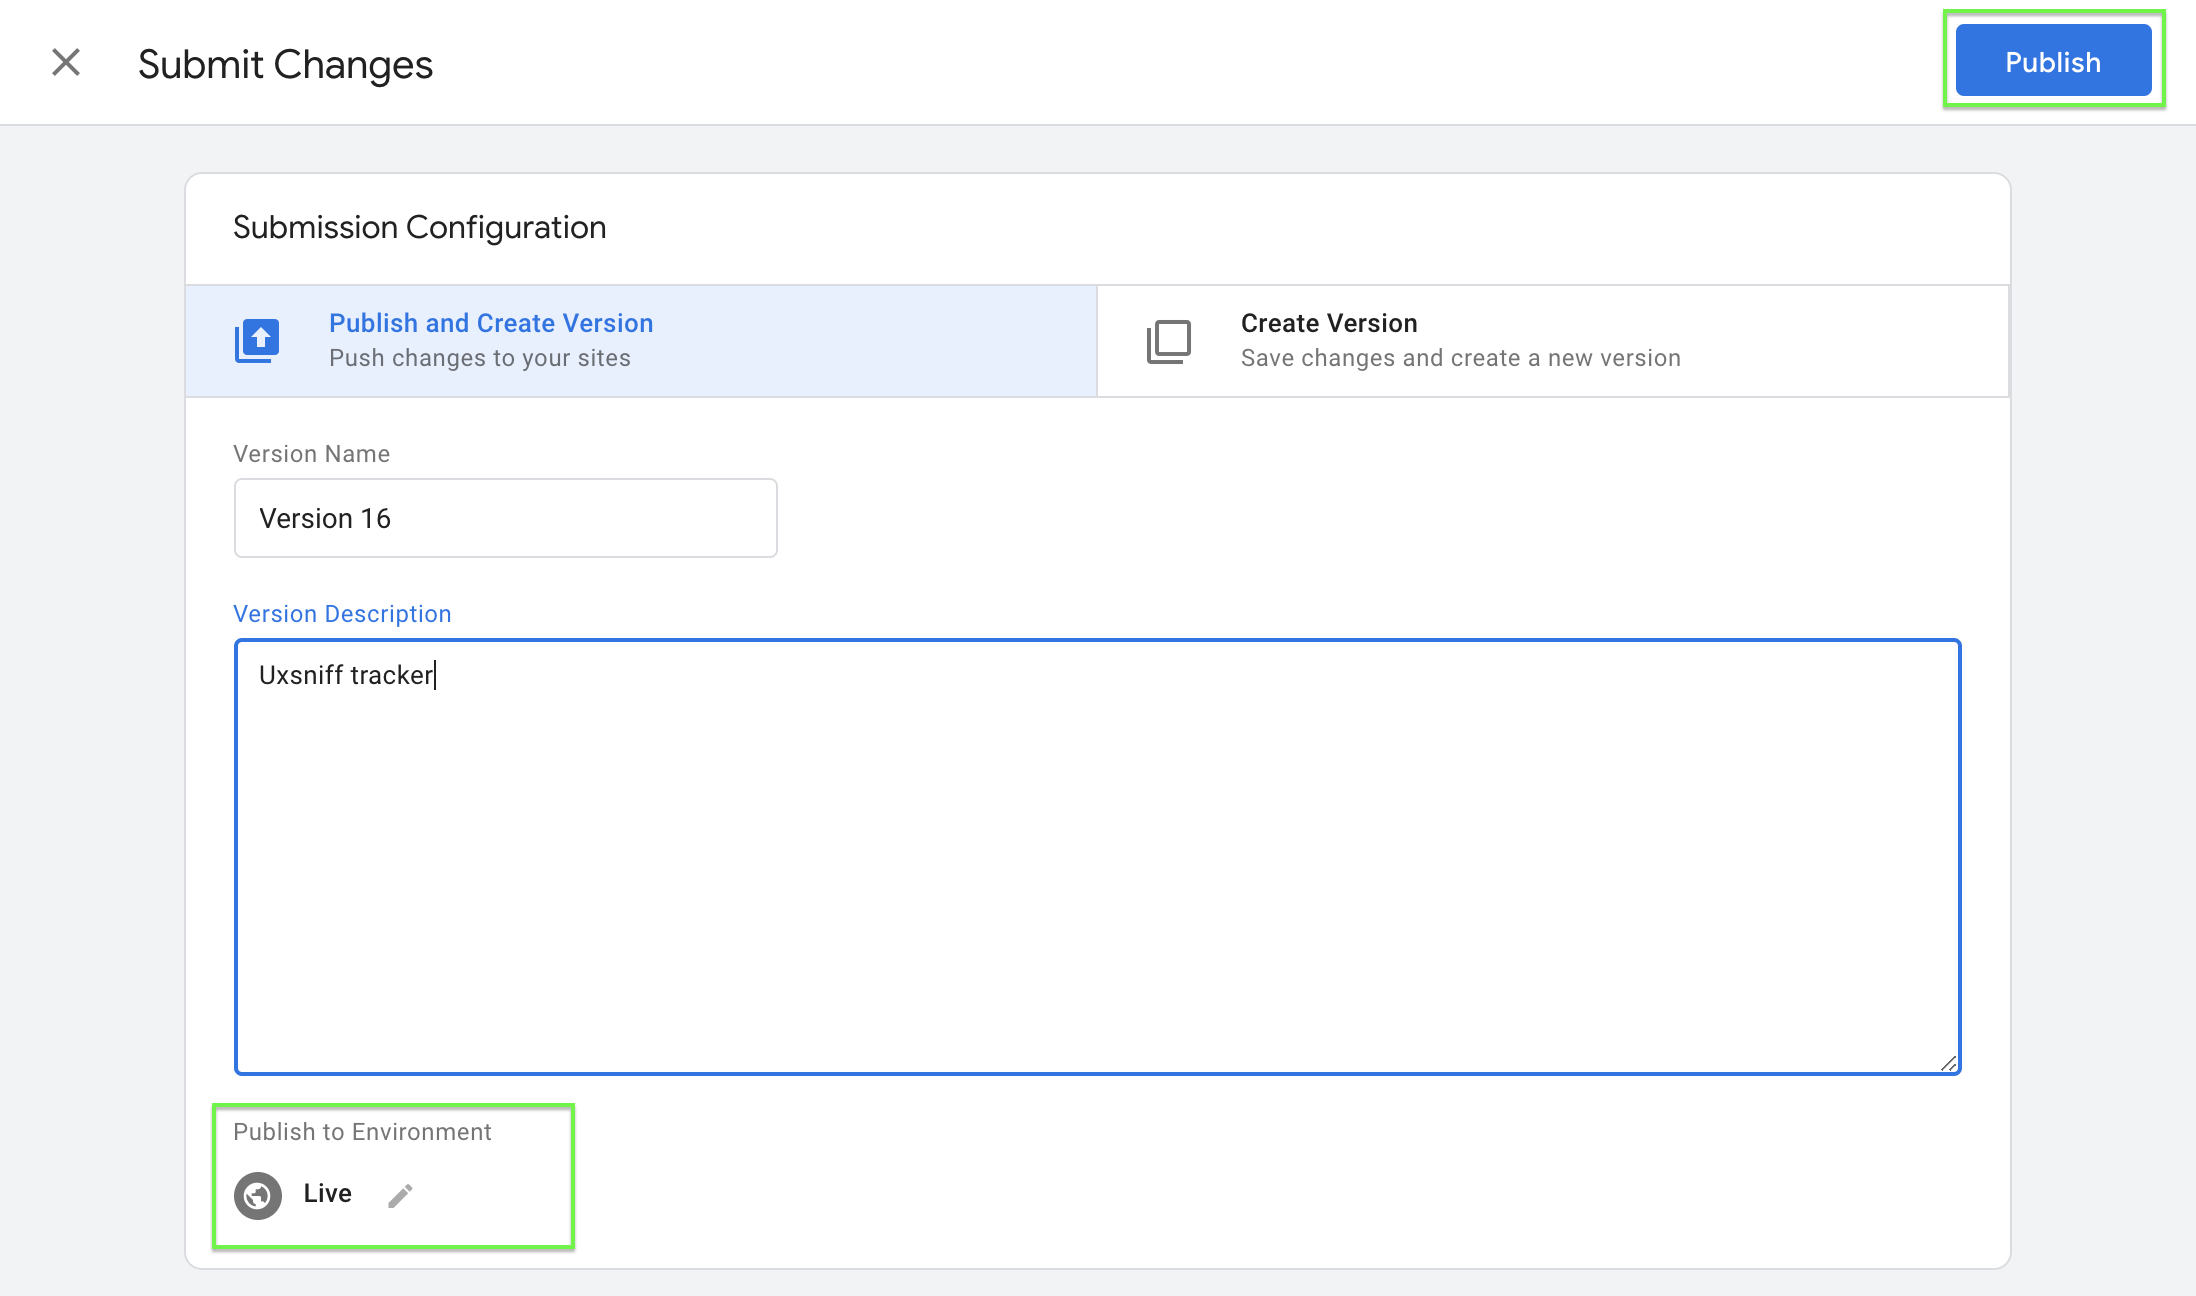
If you're utilizing Google Tag Manager to manage tags on your website, adding the Brainybear chatbot is straightforward.
1. Log in to your Google Tag Manager account.
2. Select your website's container and click Add a new tag.
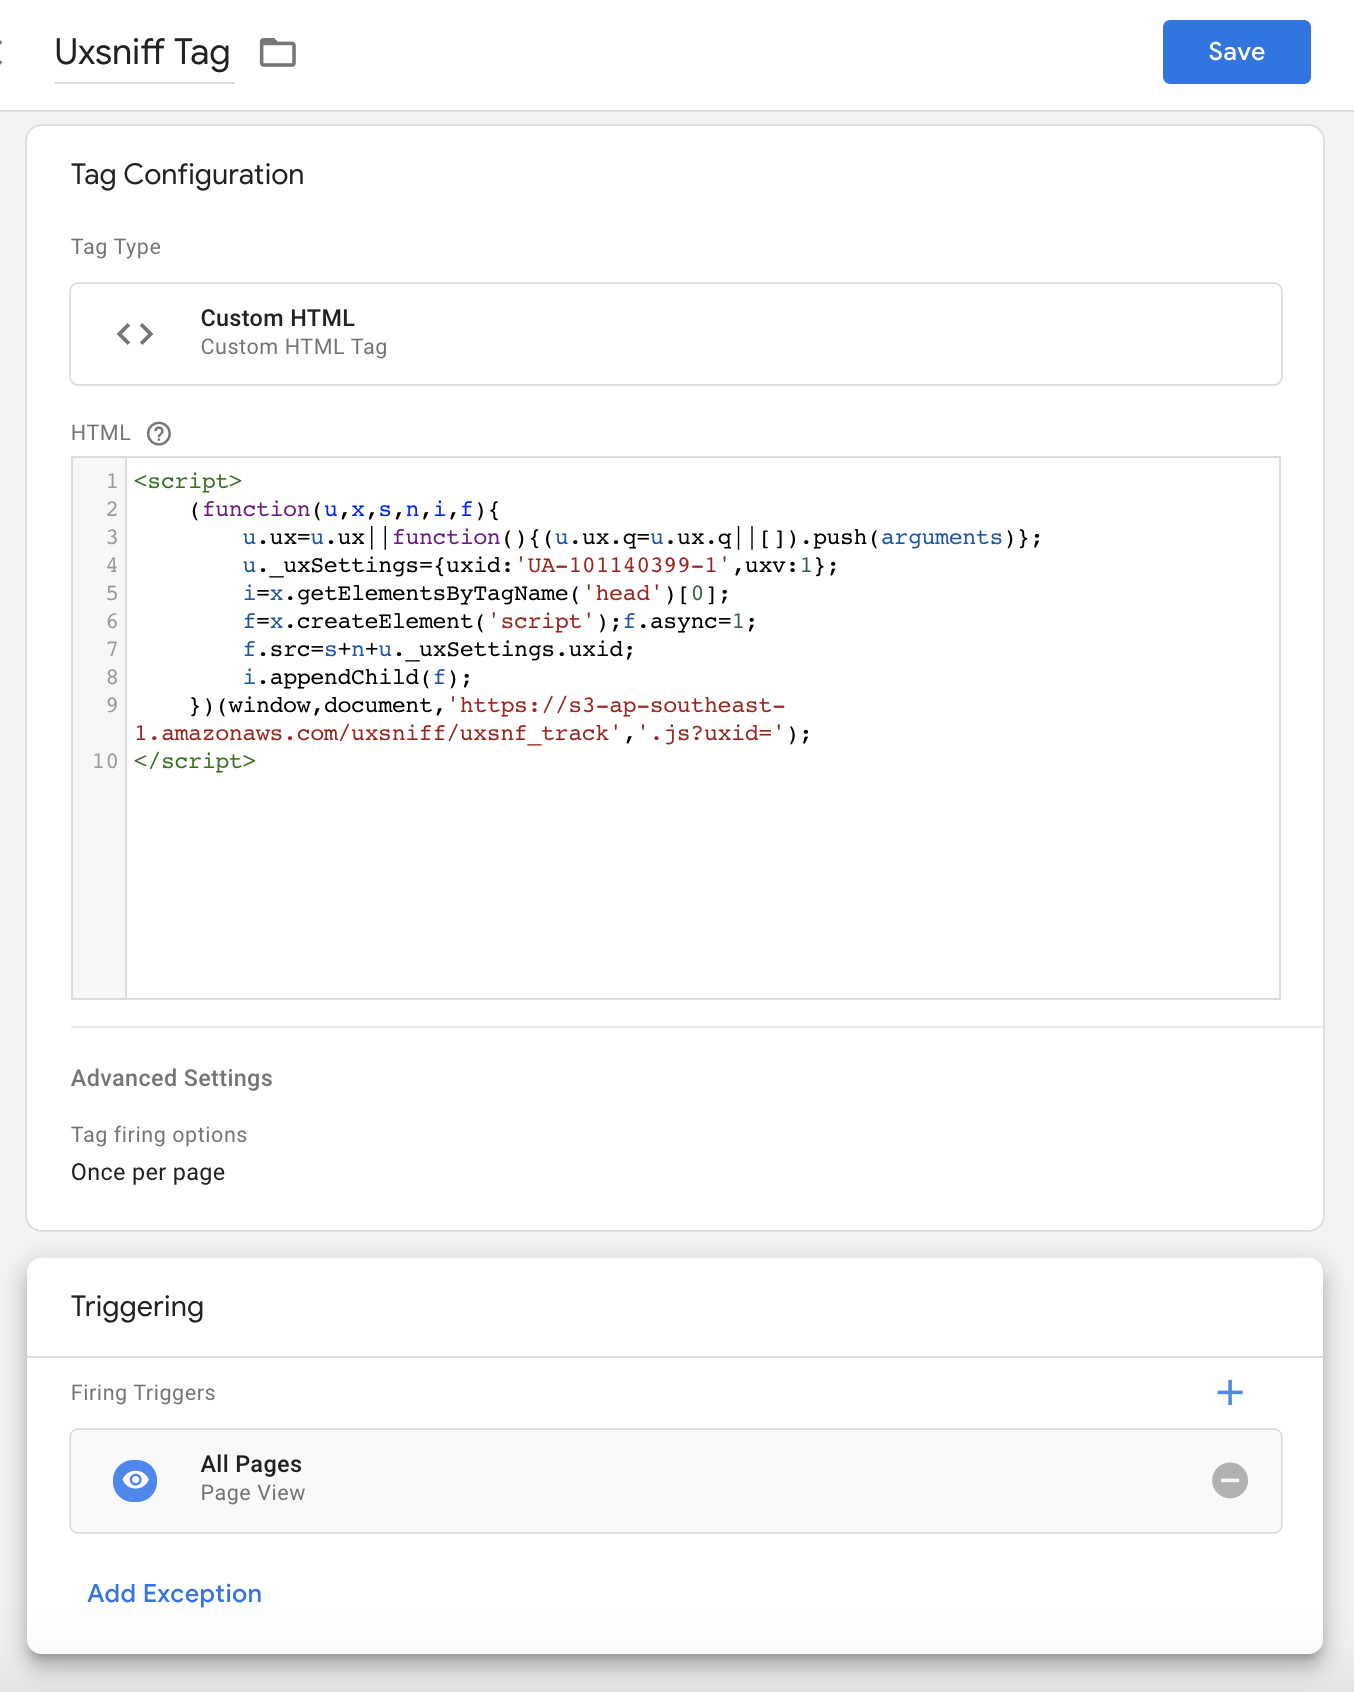
3. Choose Custom HTML Tag and give your tag a name.
4. Navigate to Brainybear > Assistants and copy the installation script for the Brainybear chatbot.
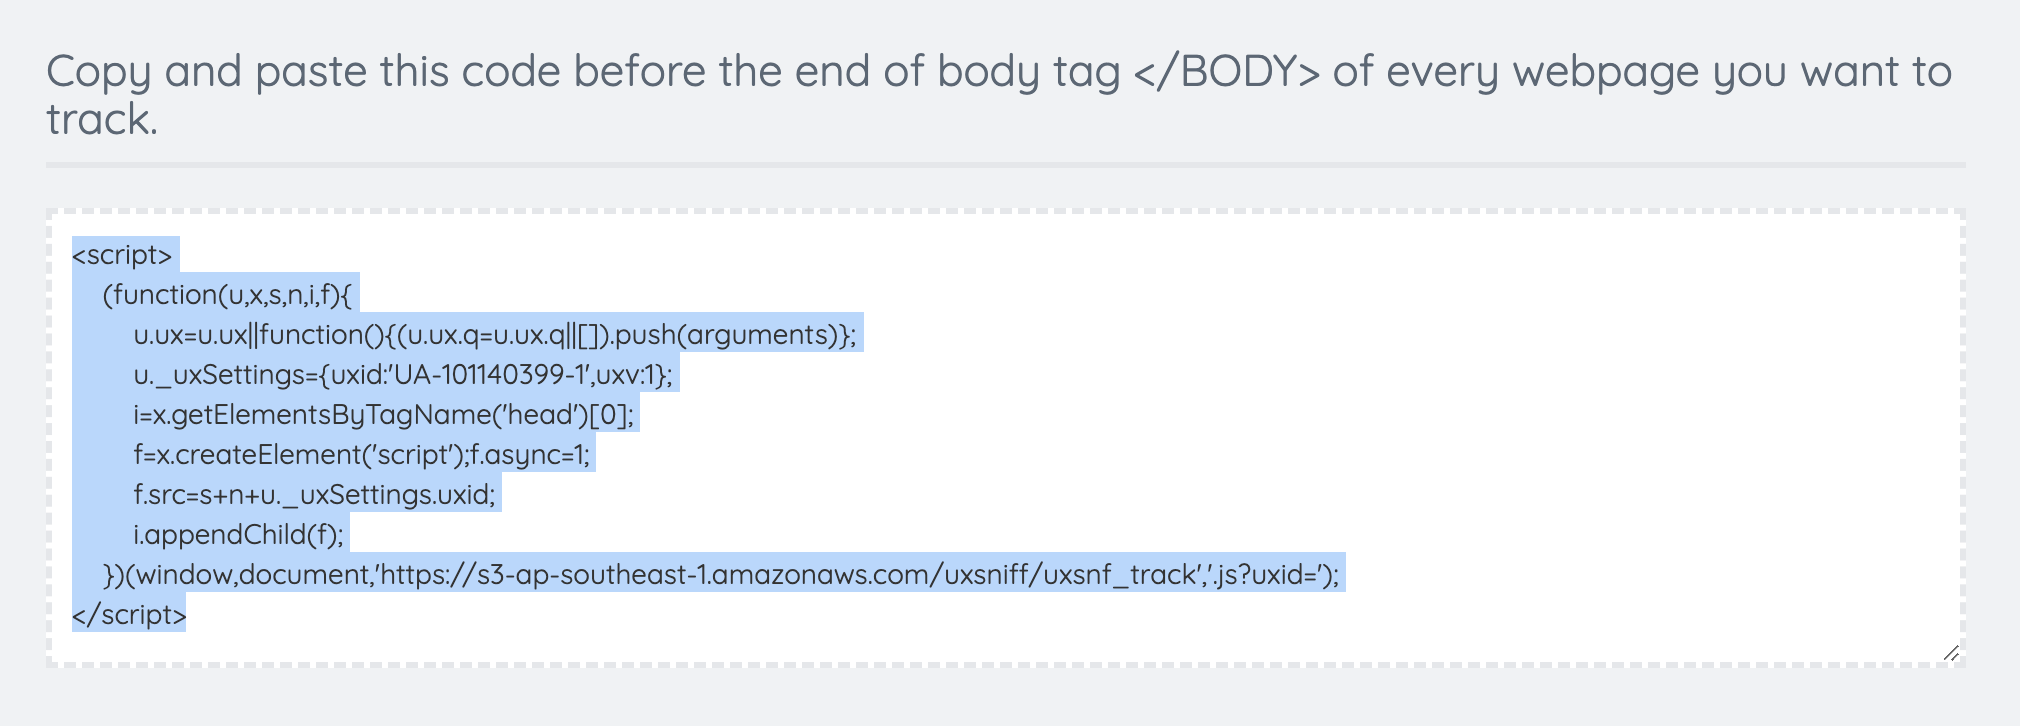
5. Return to Google Tag Manager, create a new "Custom HTML" tag, and paste the copied script into the HTML container.
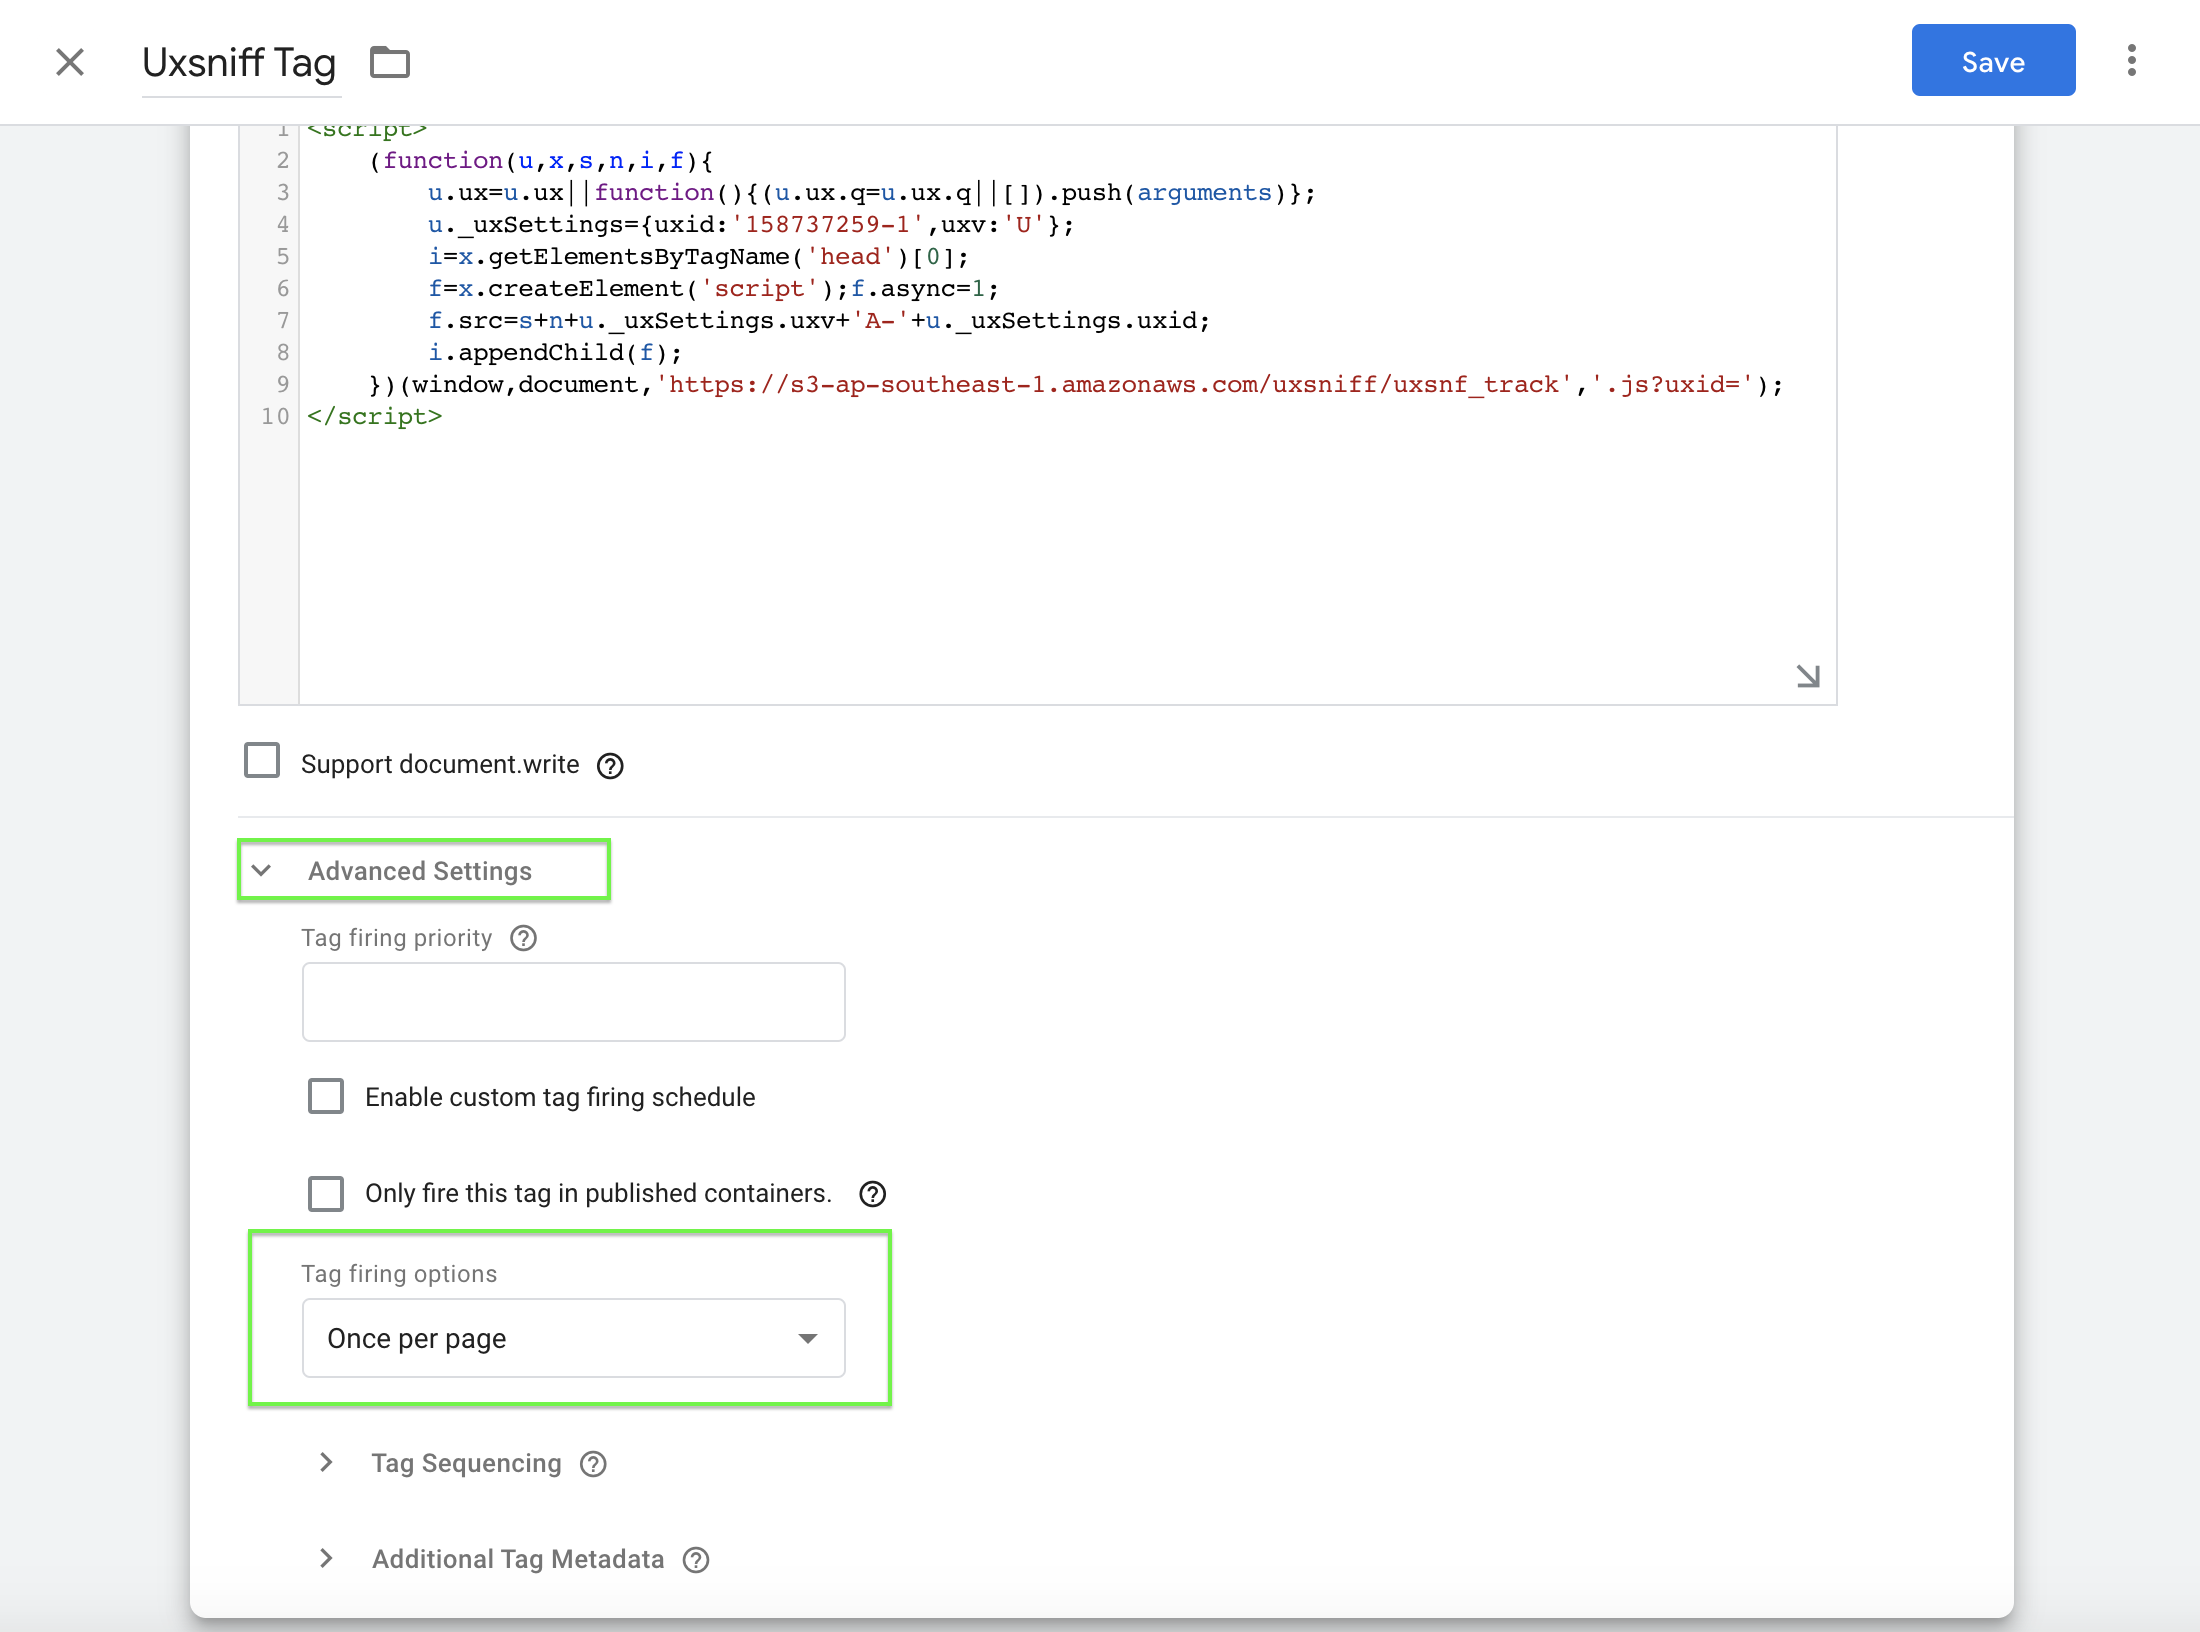
6. Under Advanced Settings, set Tag firing options to Once per page.
7. For Triggering, click the edit icon and select All Pages.
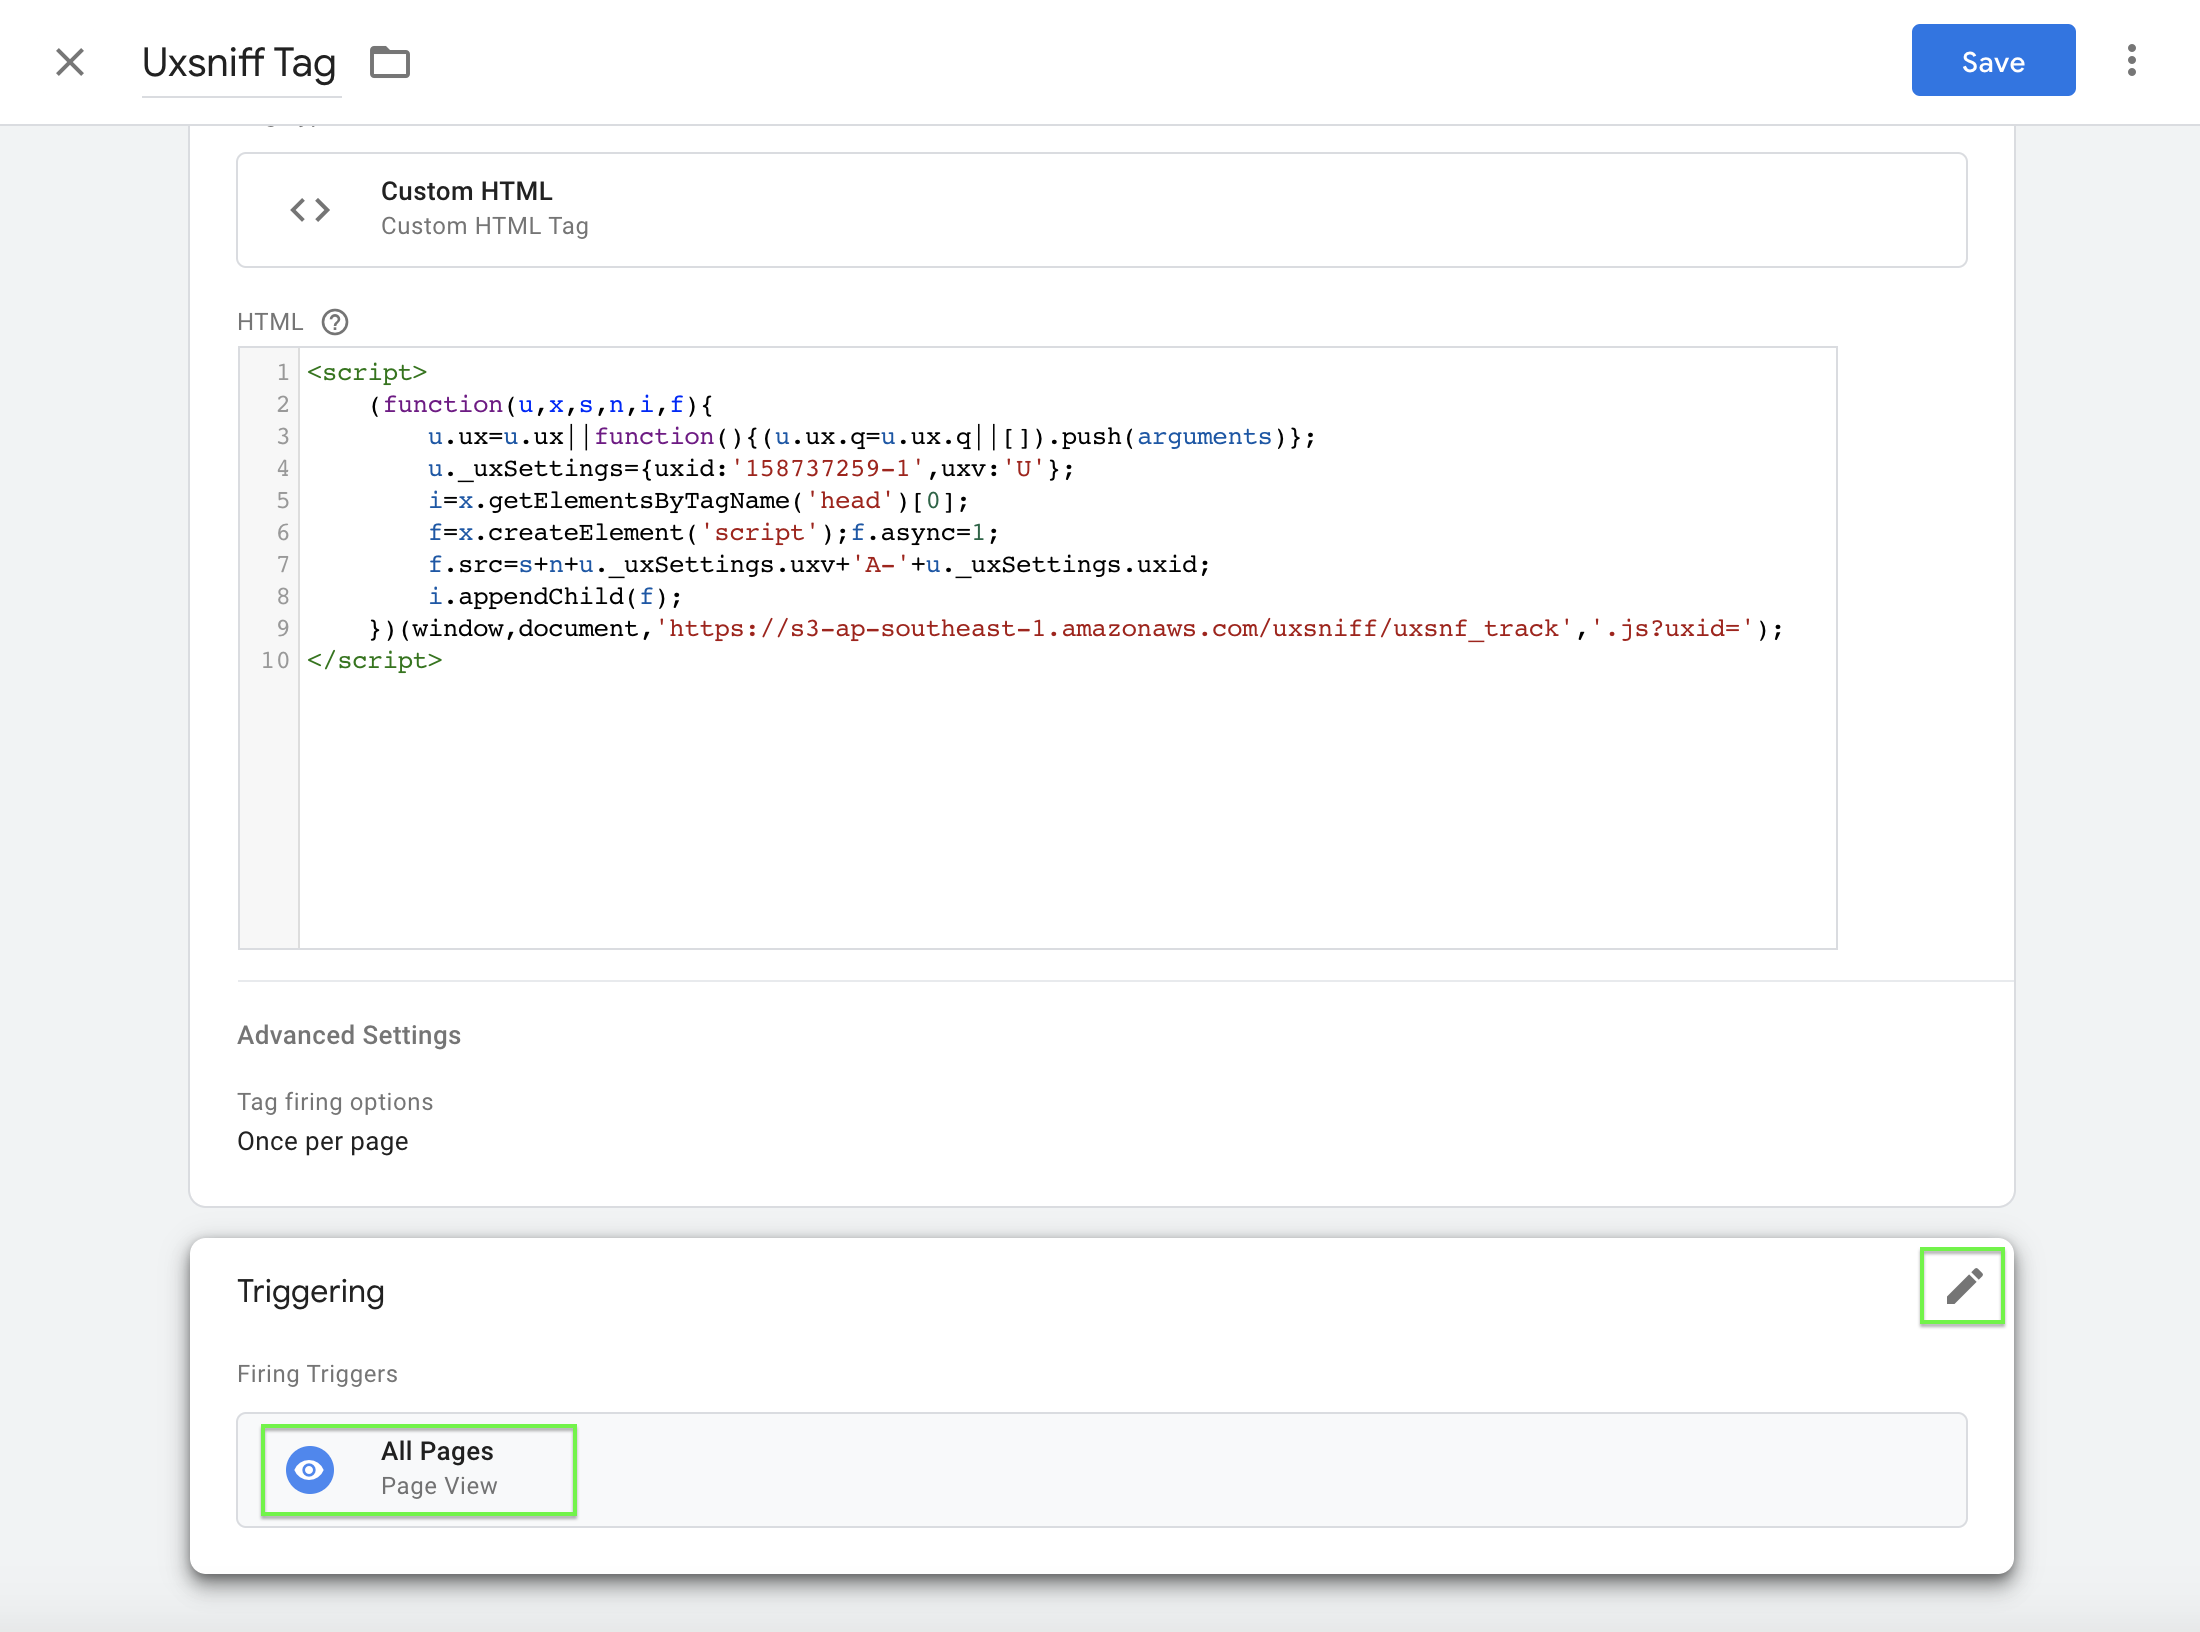
8. Click Save.
9. After setting up all tags, click Submit to finalize your changes.
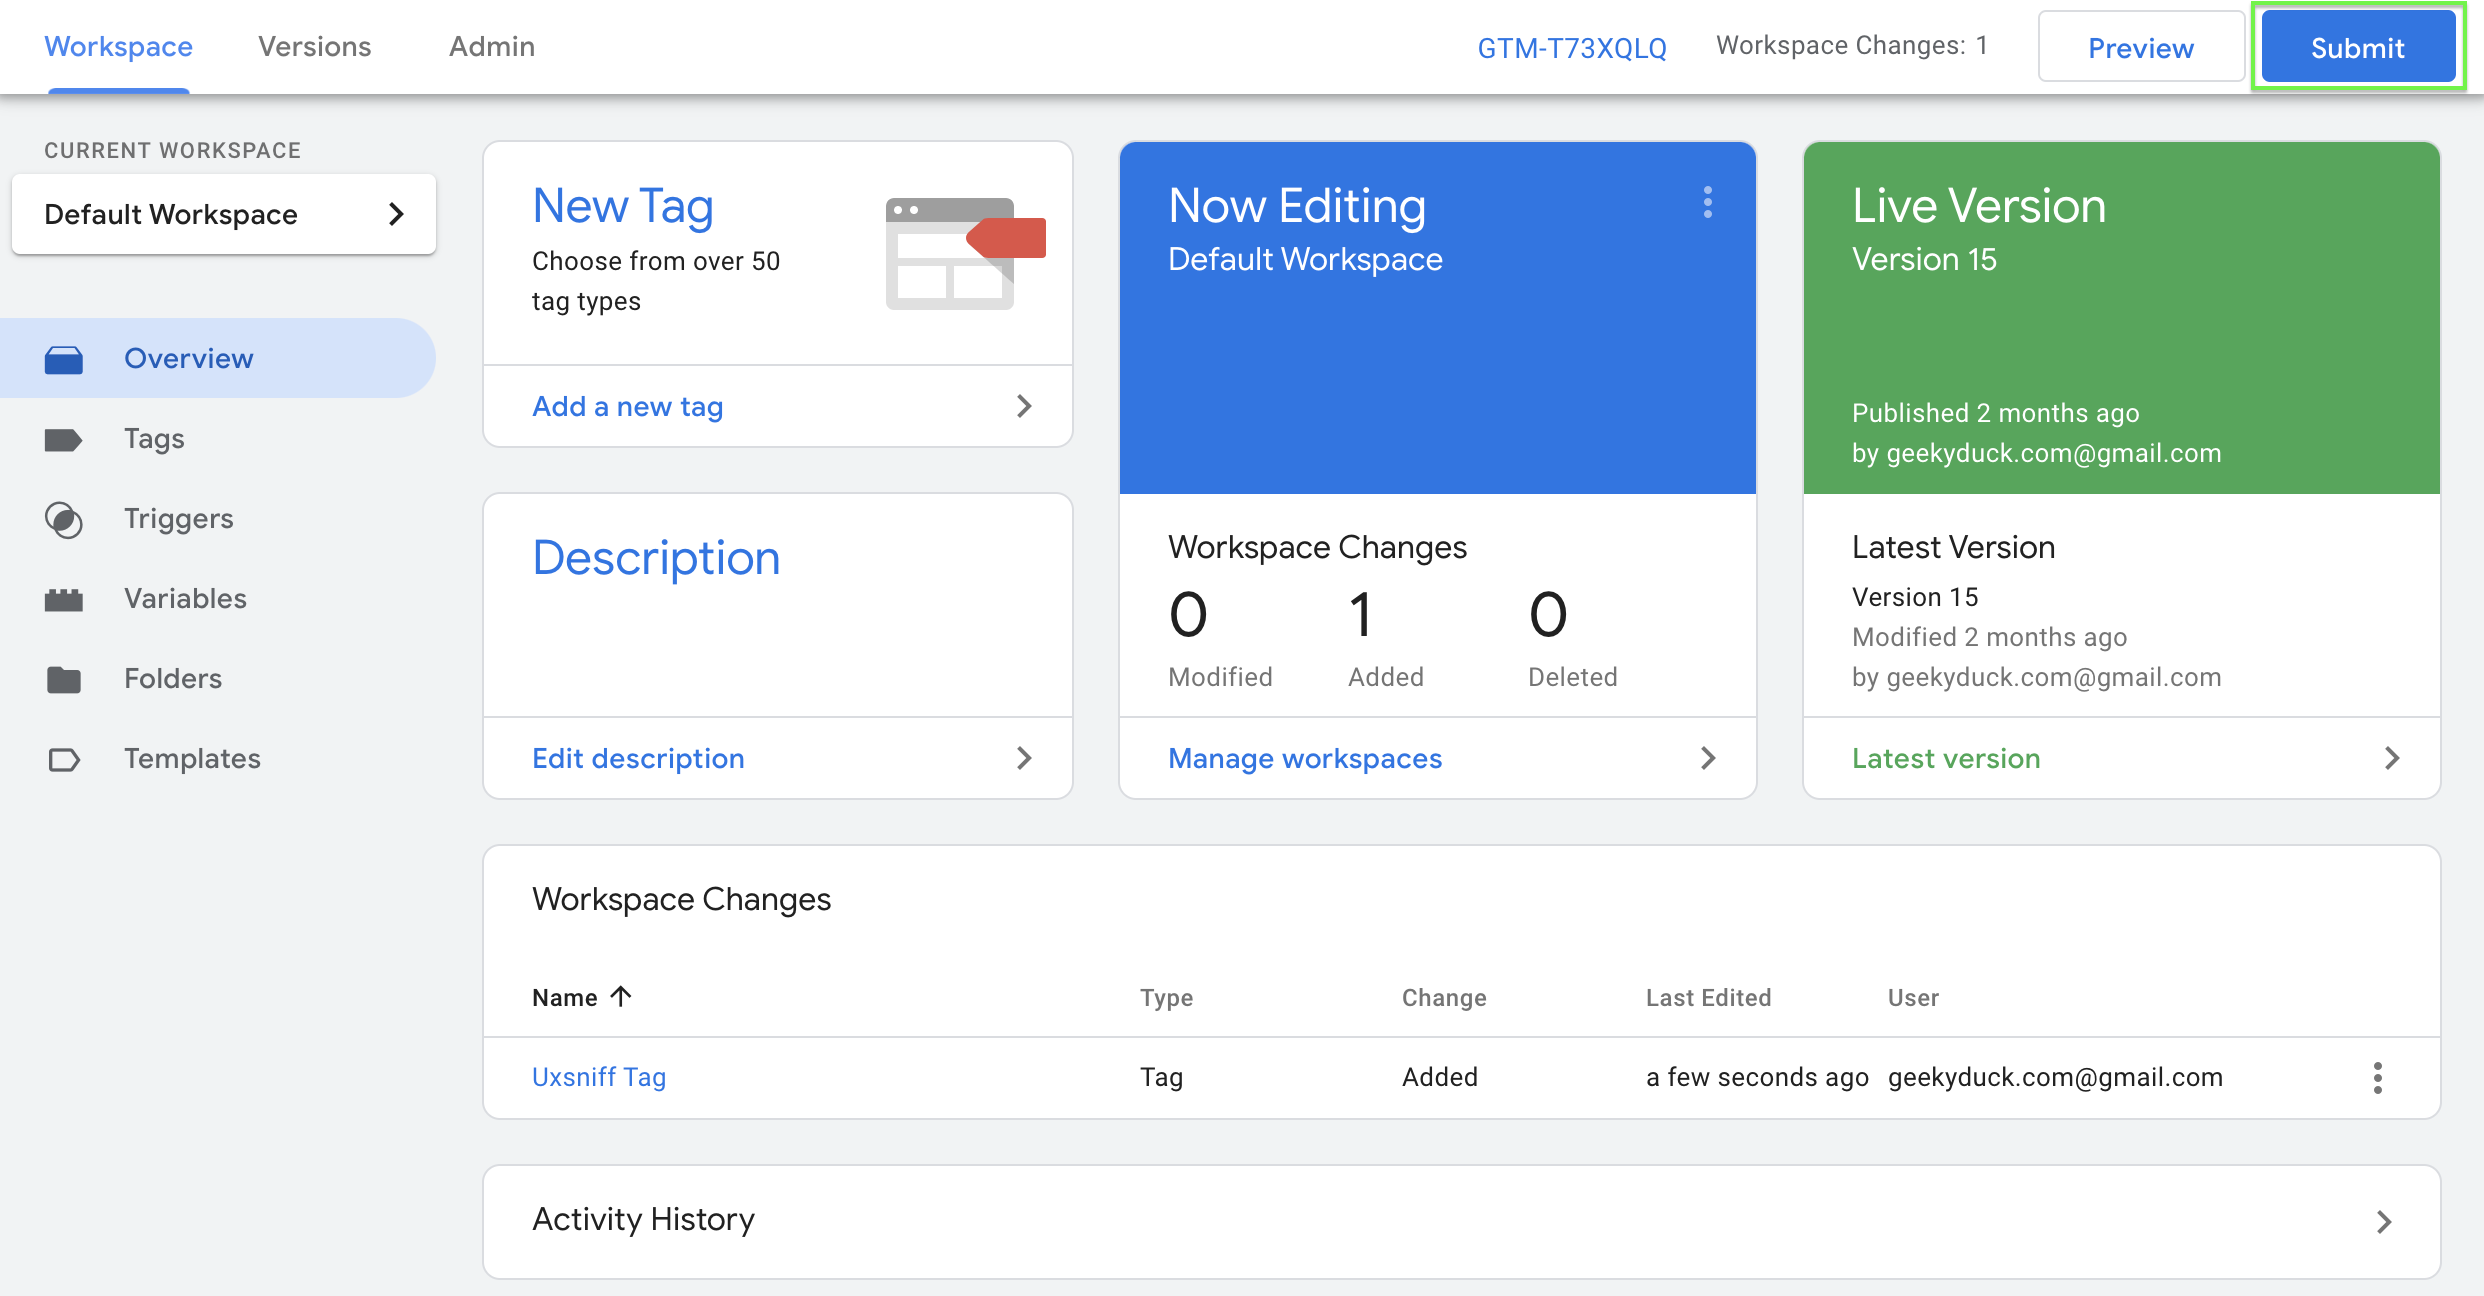
10. Finally, remember to Publish your changes to ensure the Brainybear chatbot goes live on your site.
