If you have Shopify Plus, you may be able to add third-party scripts to your checkout page and should talk to your Merchant Success Manager at Shopify to add Brainybear chatbot to your checkout.
For non-Shopify Plus customers you can install Brainybear chatbot on your Shopify storefront, however the built-in Shopify checkout will block third-party scripts, including Brainybear. This is a limitation within Shopify, however, we can suggest a workaround for tracking your Shopify checkout flow.
Some themes will a variation of the </head> tags such as {/head}, [/header], or other variations of [/head]. These all work in the same way.
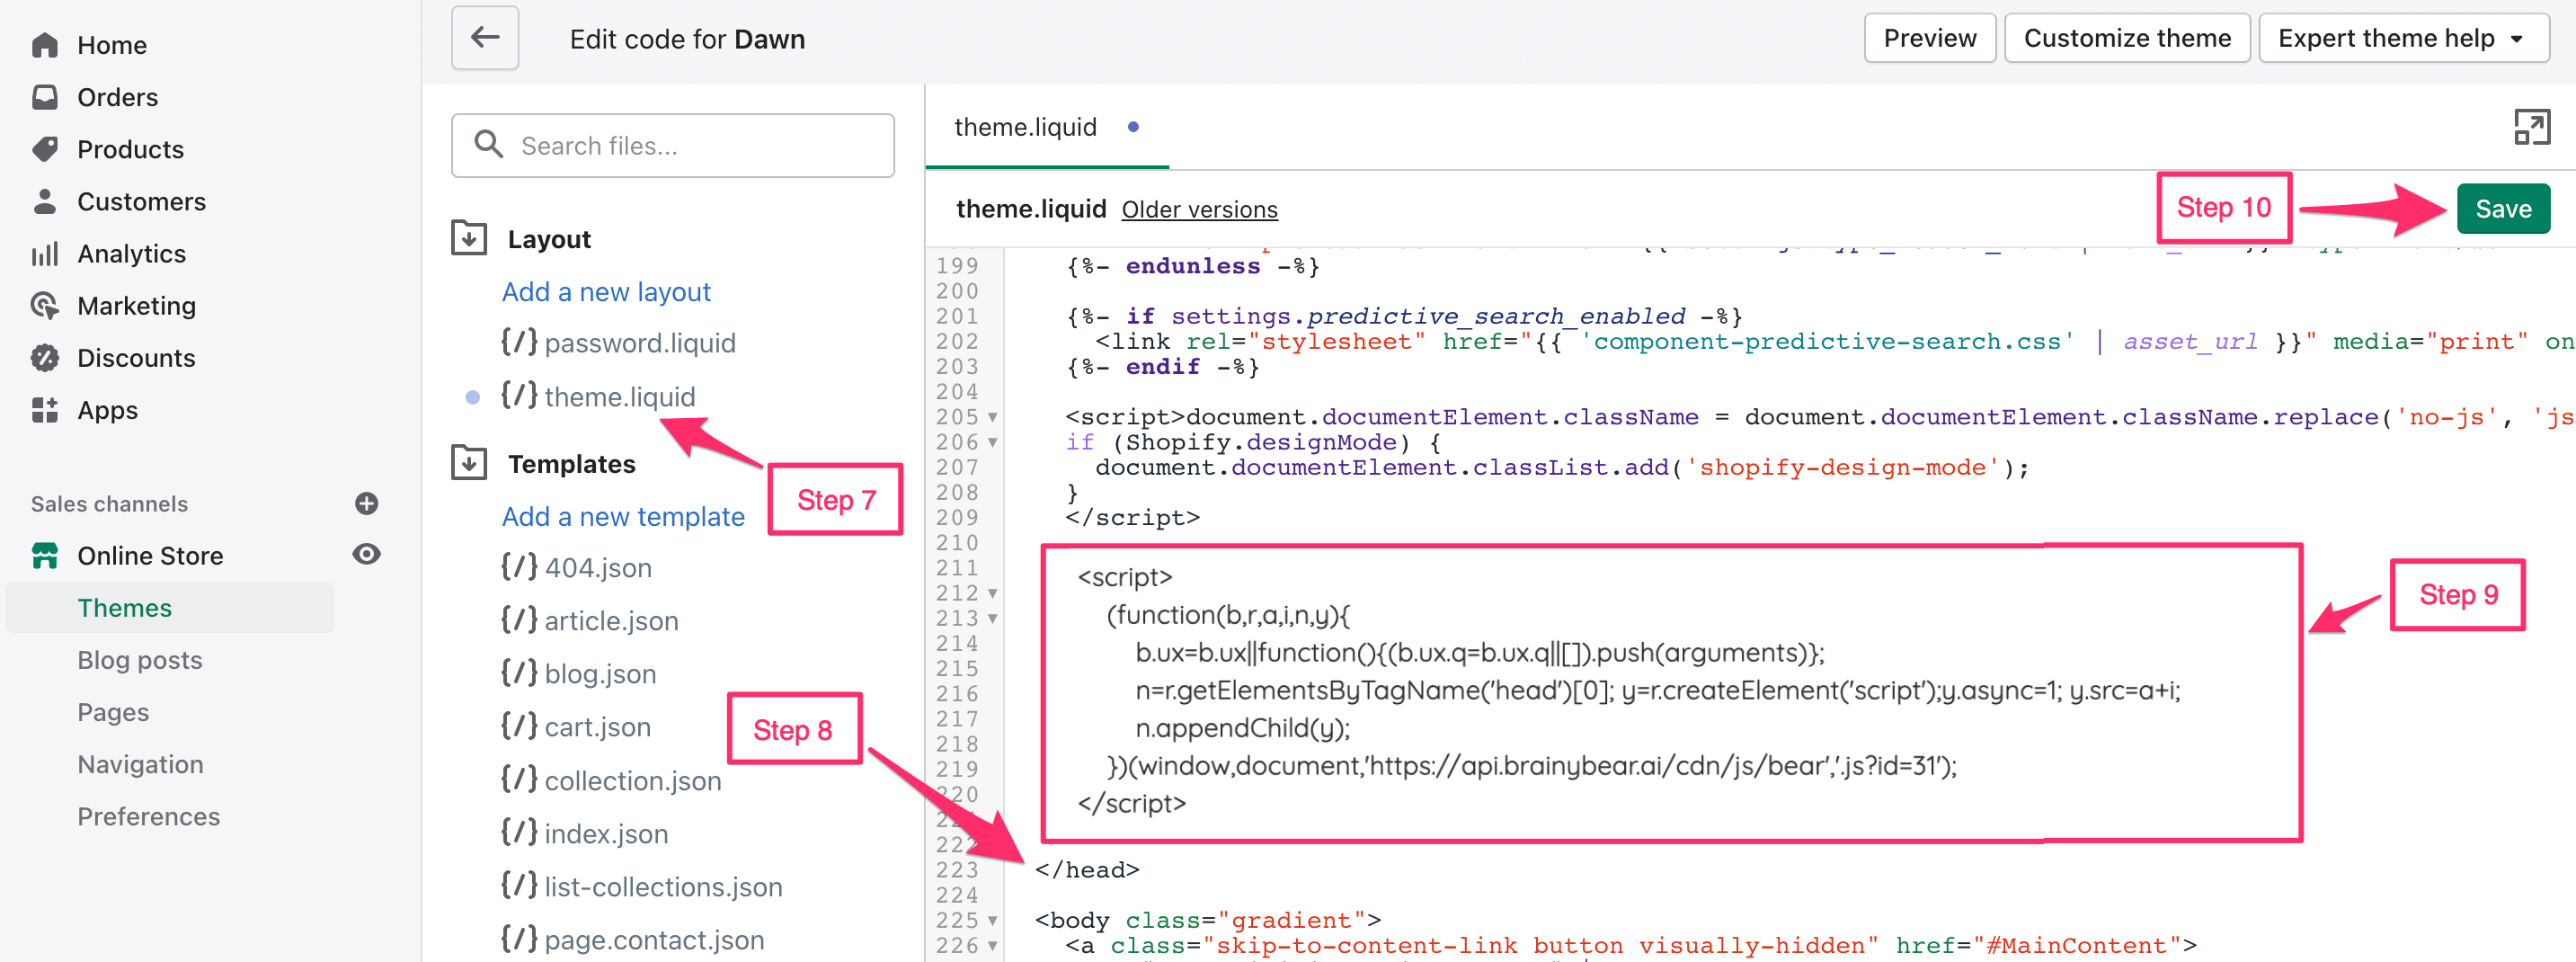
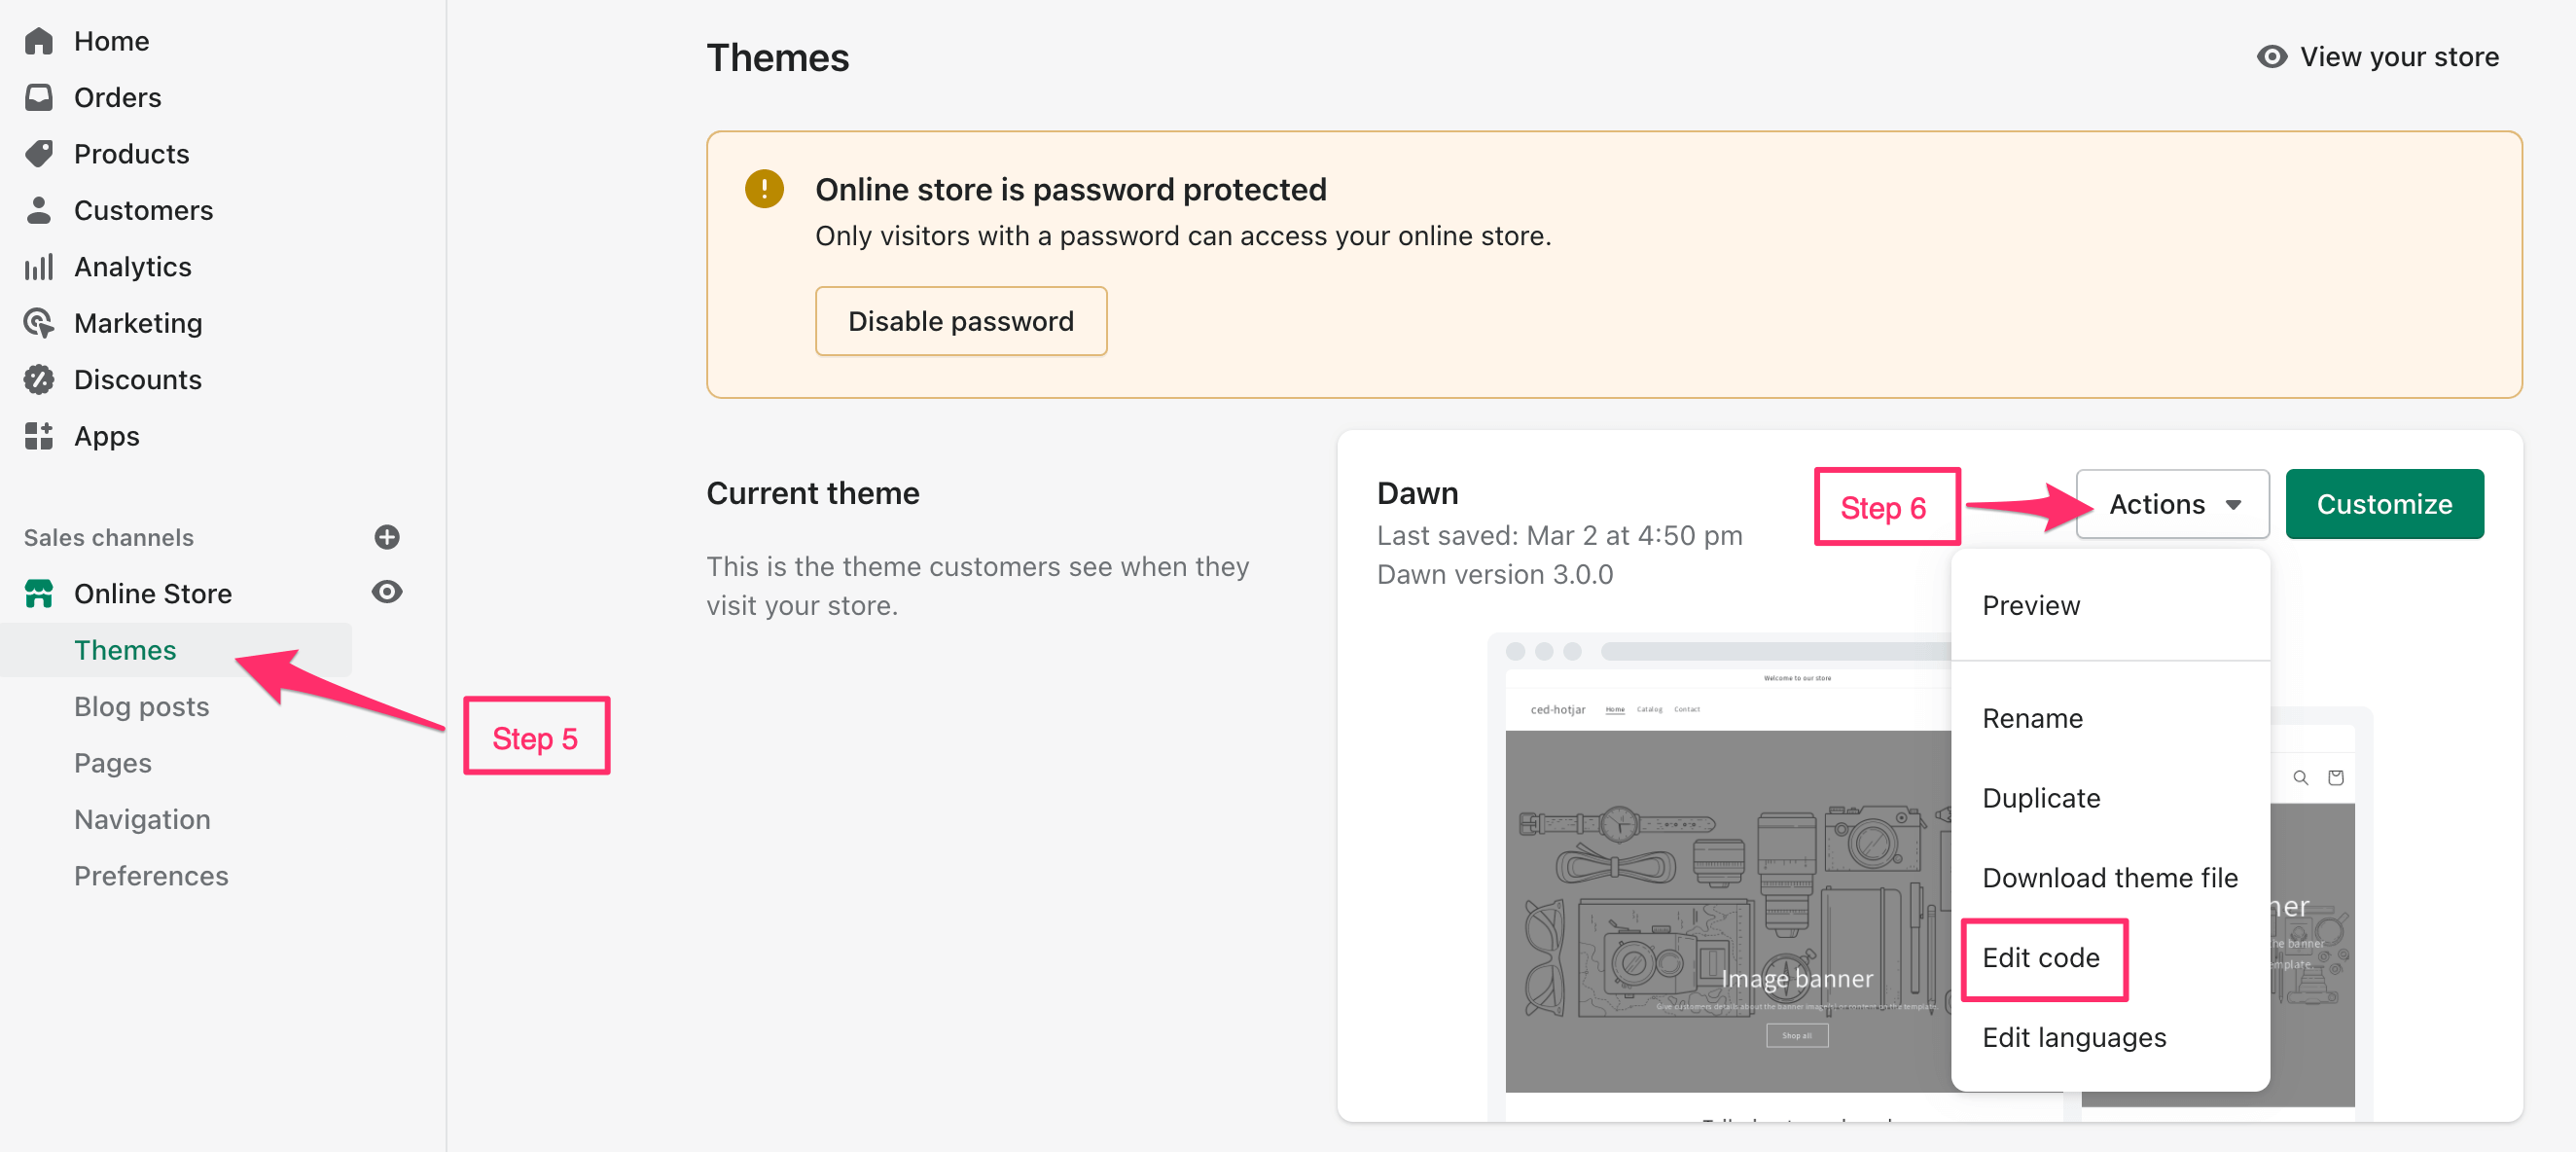
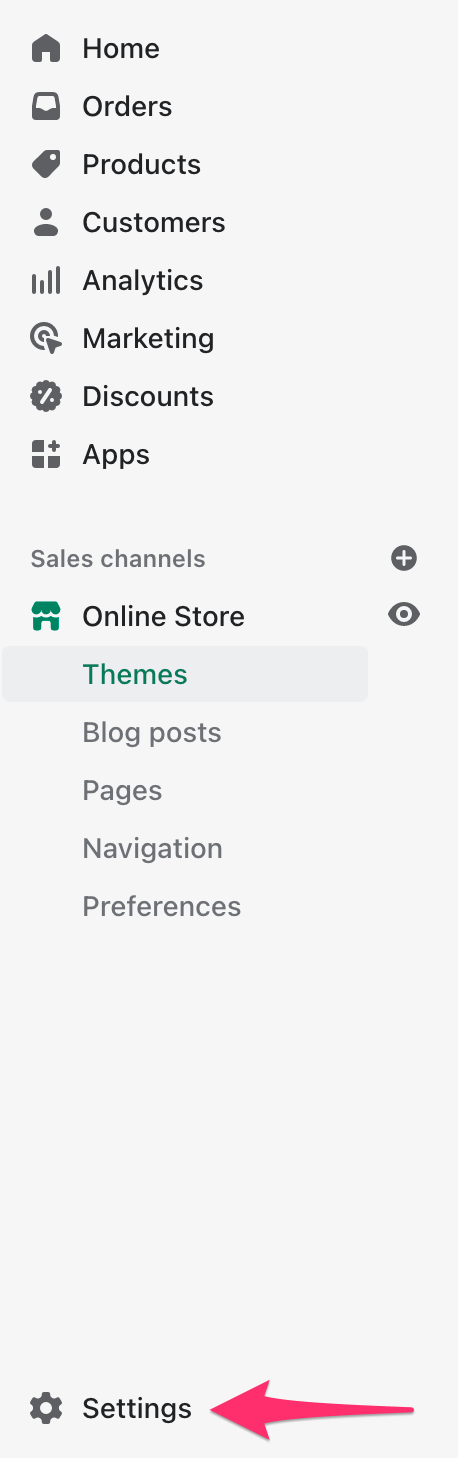
Using the steps above, the chatbot snippet should now be installed on your Shopify storefront. To also track the order status page, you'll need to install the Tracking Code in another section of Shopify. Follow the steps below for help with doing this.
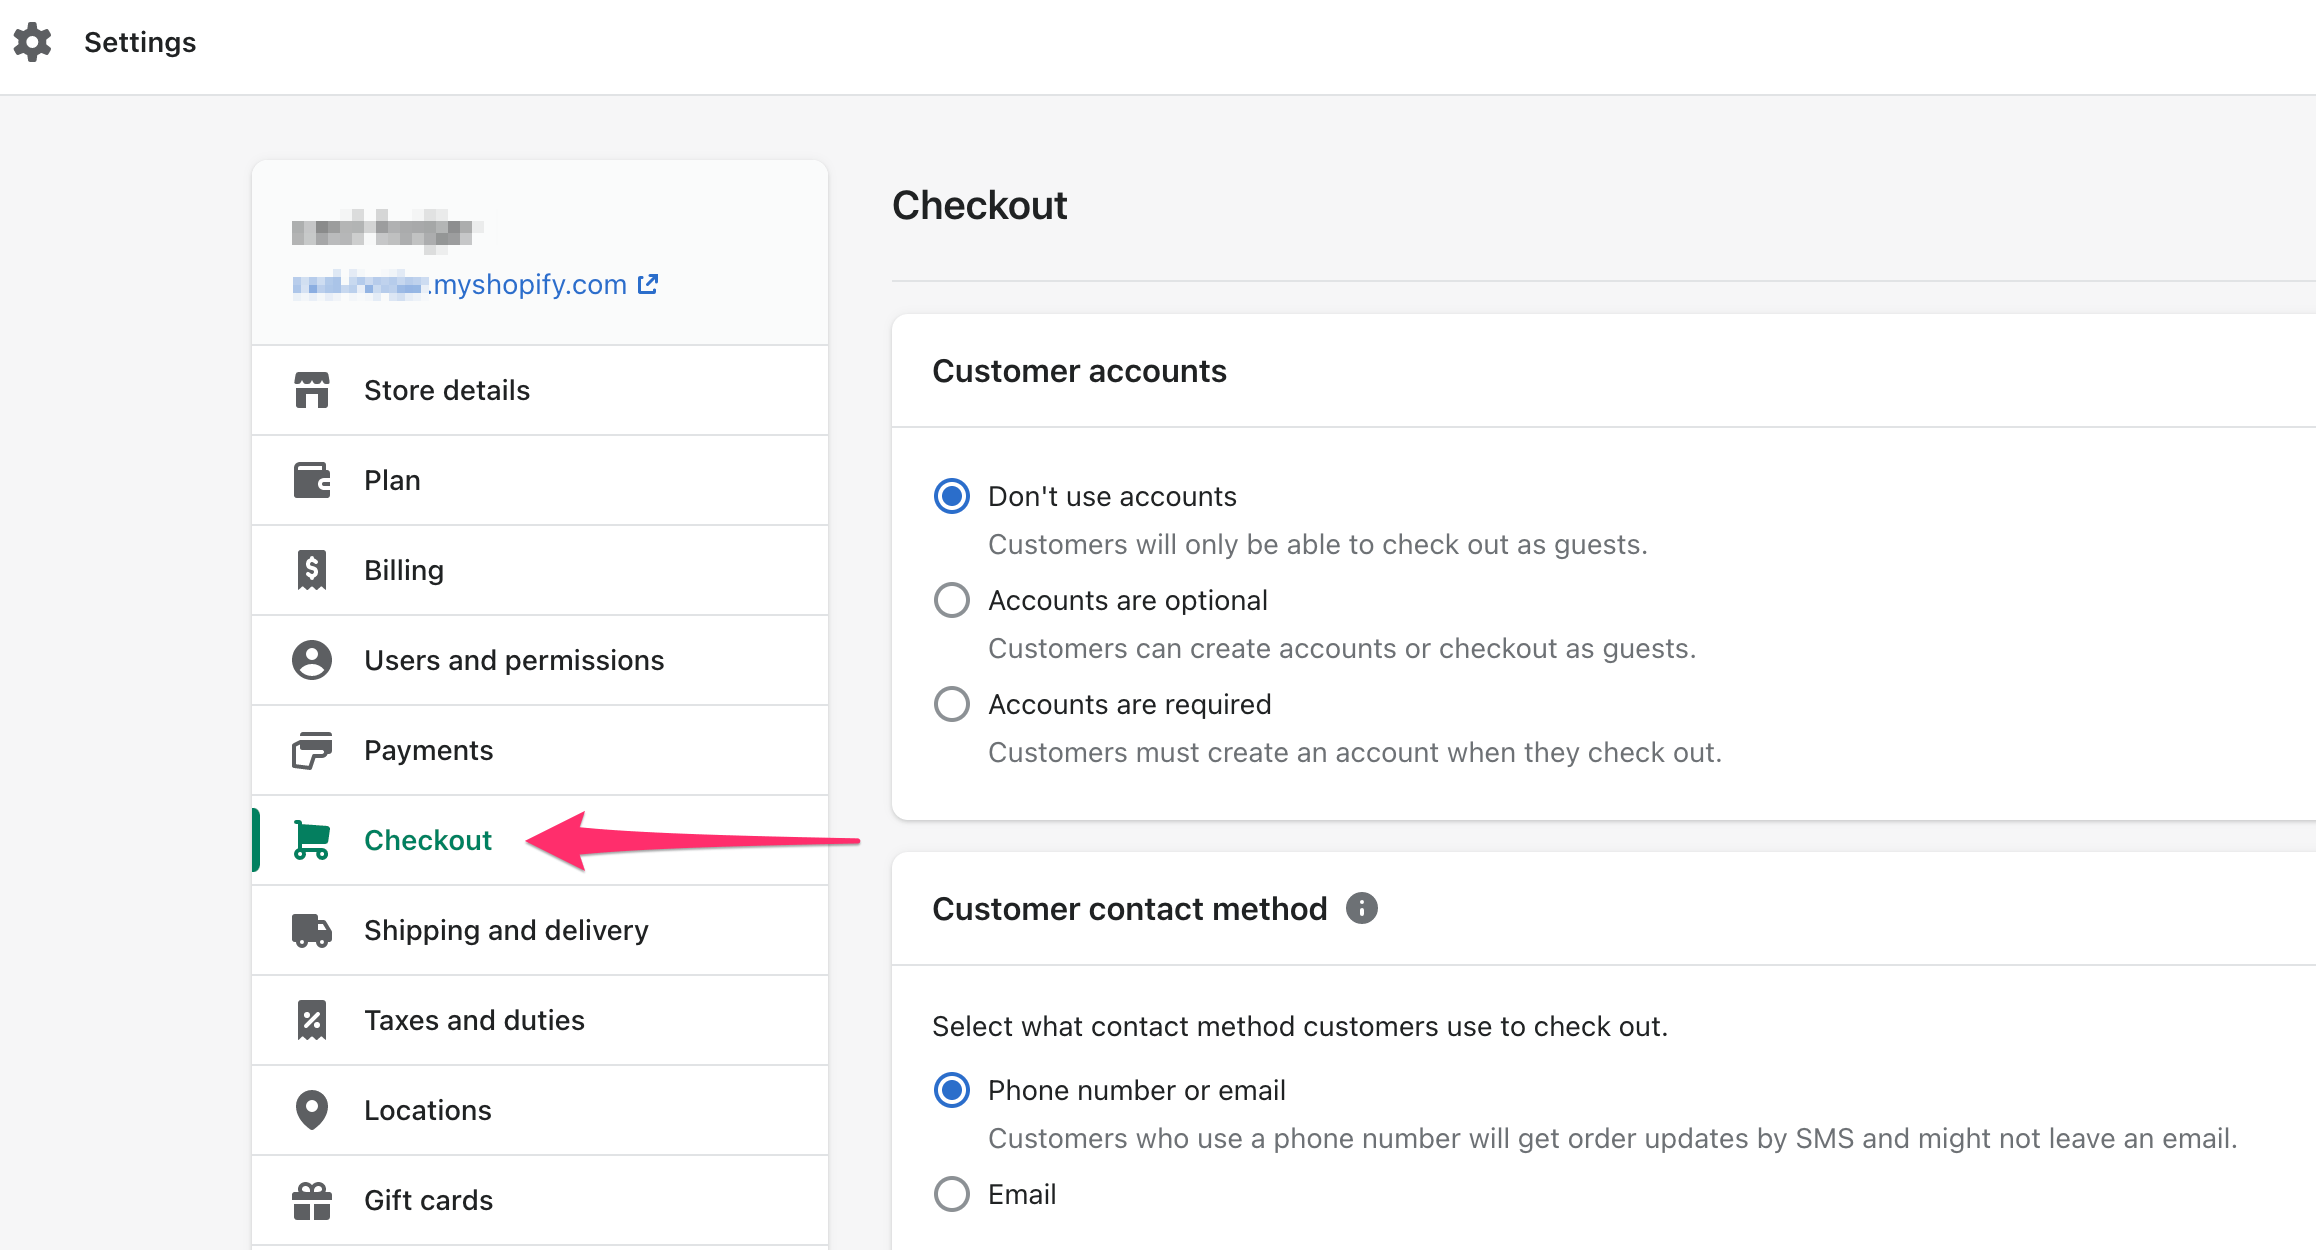
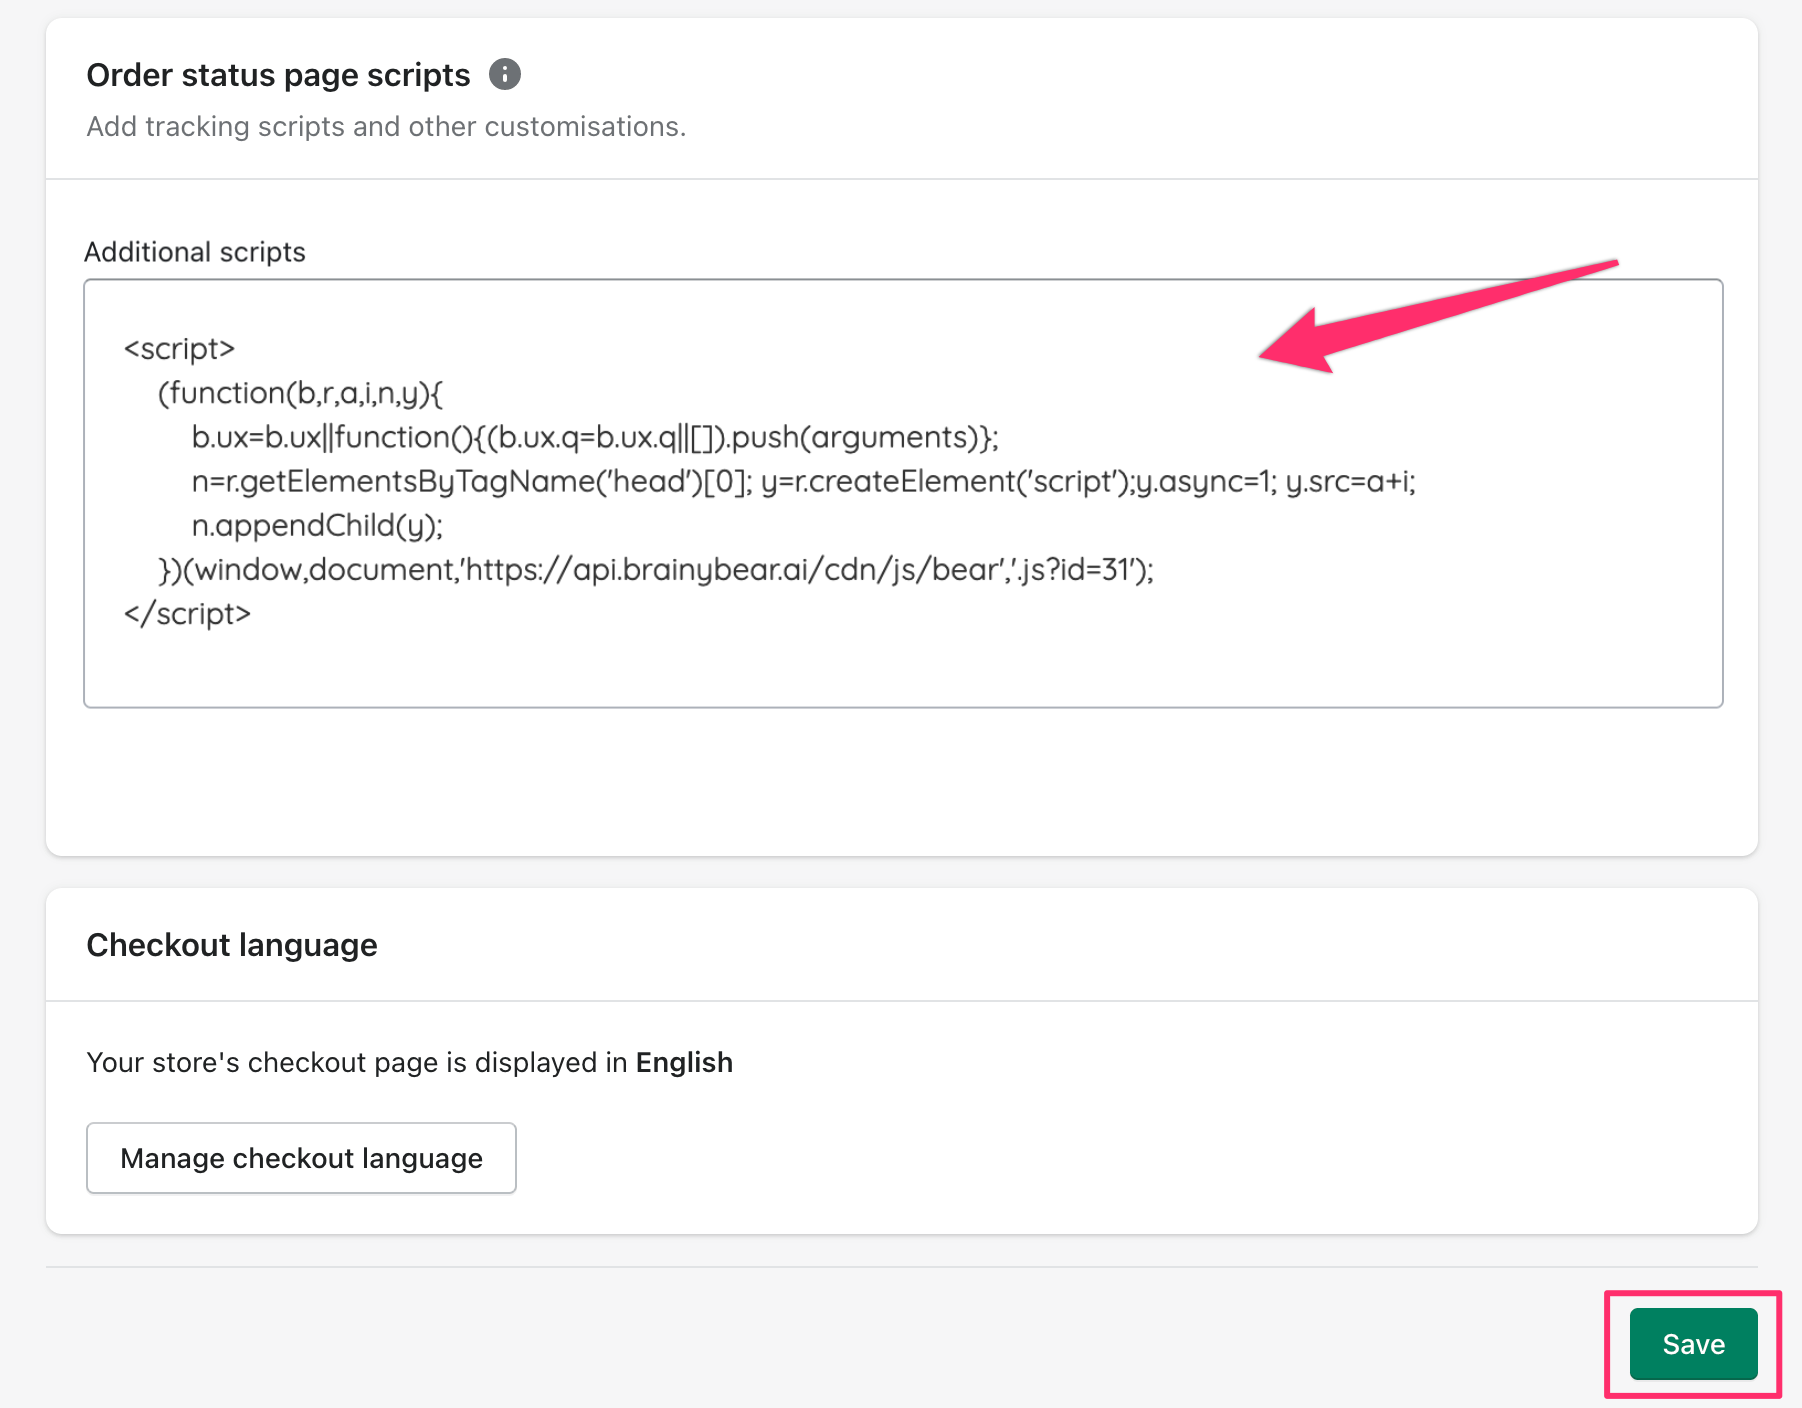
The chatbot snippet should now be installed on your order status page. This does not install the chatbot snippet on your Shopify checkout, as Shopify's built-in checkout doesn't allow third-party scripts, such as Brainybear.